Creating Product Mockups - Making the Mockup
Creating mockups is so much fun! I love photographing something and turning it into a tangible tool that can be used to share my artwork. In this post, I am going to show you my process for creating mockups so you can create your own mockups.
This is post 3 of my creating Product Mockups blog series, and today I am going to show you how to make a mockup for patterns on a shirt. If you have not read post 1 or post 2, go take a peek at those posts and then come back to this one.
In post 2, we photographed and edited our image. But, we still need to get our pretty pink kid's tank top shirt to be white for our mockup. I couldn't find a white one in my daughter’s clothing drawers, so I decided we would make this pink tank work by removing the color.
Creating Product Mockups
How to make a t-shirt mockup - A step-by-step tutorial
There are four steps to creating our product mockup file:
Step 1 - Removing Color
We are going to remove the color from our shirt. (Note: There are two ways to do this depending on how you want your photo to look). If your photo already has a white mockup item, then you can skip this step.
Step 2 - Create Displacement Map
Since we are creating our mockup for fabric, we will need to create a Displacement Map to give a more realistic look to our finished mockup.
Step 3 - Create and Define Your Shape & Smart Object Layer
In this step, we create the shape layer to conform to the object we are mocking up, and convert the shape to a smart object layer.
Step 4 - Apply the Design, Hide Edges & Save
In the last step, I will show you how to add your artwork to the Smart Object Layer, and do some final touches to finish our mockup file.
All files used in this tutorial are available for download at the end of this post. I also included the finished mockup files as well. Note: In this tutorial I am using Photoshop CC, so if you are using another version, there may be some differences. Let’s get started!
Watch the video tutorial here in this video, and follow the step-by-step written instructions below!
STEP ONE: REMOVING COLOR FROM THE SHIRT
There are two ways of removing color from your image to prepare them for creating your mockups.
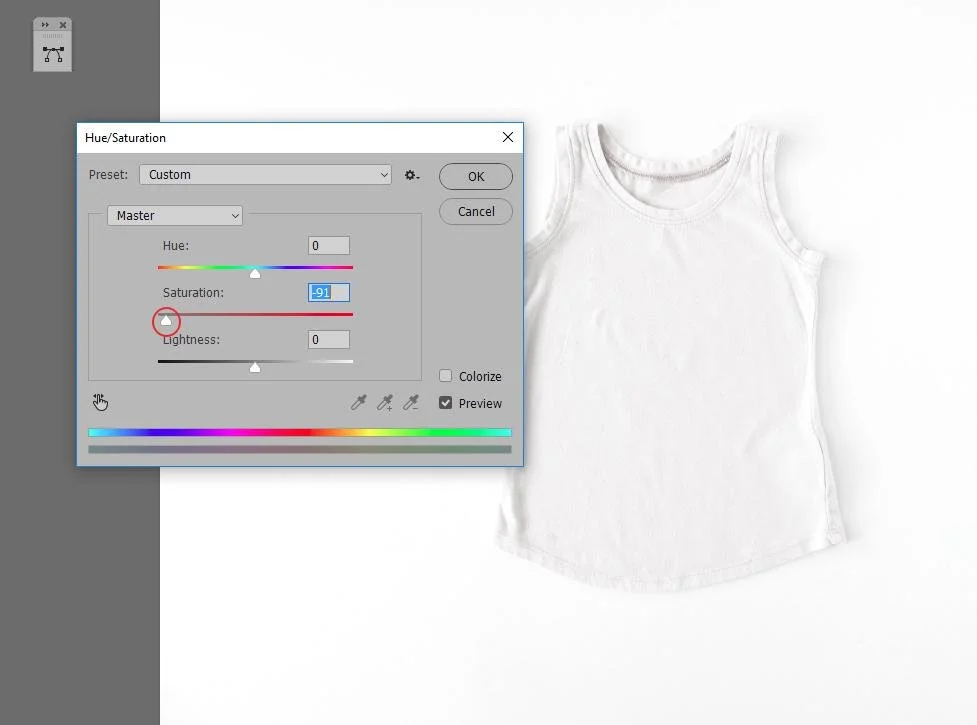
1. Desaturate the Whole Image - do this only if you do not have props in the image, and if you do not want to keep the background color.
To desaturate the whole image, go to Window > Adjustments, and desaturate your image by moving the Saturation slider to the Left.
Then, rename and save your image.
2. Desaturate Only the Shirt - If you have props, or want to keep the background color, then use this method. You do the same process as method 1, except you do this after you create your vector shape. (see Step 3 below.)
STEP TWO: CREATE THE DISPLACEMENT MAP
A Displacement Map is a grayscale version of your image, but saved out as a Photoshop file. The displacement map distorts your graphic to conform to the light and dark areas of the map using the Displace Filter. It gives a more realistic look to your artwork by shifting the pixels, and creates an illusion of depth with light and contrast.
To create the Displacement Map, we are going to use the Channels. Note: if you already saved out a grayscale version by desaturating the whole image in the section above, you can create a Displacement Map with that image, and save it out as your Displacement Map after creating the Gaussian Blur mentioned later in this section.
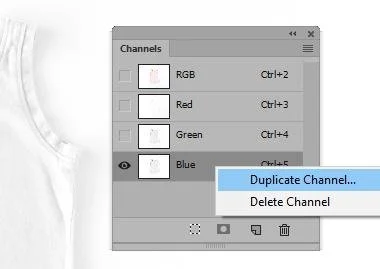
Go to Window > Channels to open the Panel.
You will see all the Channels in the image: RGB, Red, Green, and Blue. Out of the Red, Green, and Blue, channels, we are going to select the channel that has the most contrast to it. Which, in the case of our shirt image, is the Blue channel.

Duplicate the Blue Channel by Right Clicking and Selecting, Duplicate Channel.
A window Duplicate Channel window will pop up.
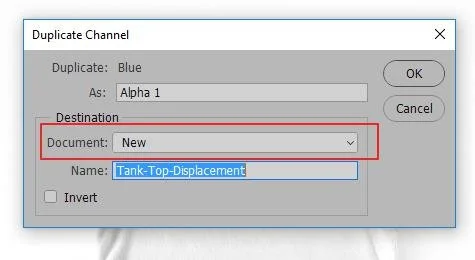
In the Document field drop down, select New (because we are creating a new document), and in the Name field, name it Tank-Top-Displacement, then Select >Ok.
In your new file, Go to Filter > Blur > Gaussian Blur.
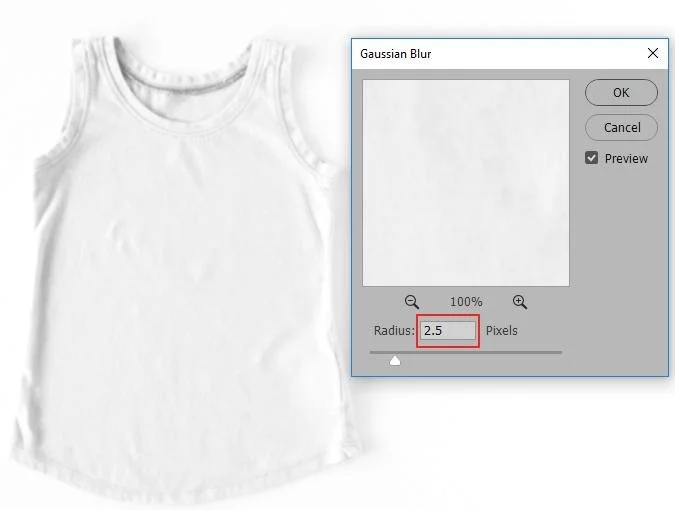
Enter 2.5 pixels in the Radius, and then Select > Ok. This will add a softness to our mockup’s shadows.
Save out this file as a Photoshop (.psd) file, as Tank-Top-Displacement.psd
STEP THREE: CREATE AND DEFINE YOUR SHAPE & SMART OBJECT LAYER
This is a very important step. Creating the vector shape layer with the Pen Tool in Adobe Photoshop is the method used to define the area in which your pattern design will be on the shirt. When I create my mockups I use the Pen Tool because it gives you the most flexibility in defining your shape. When working with fabrics, you need to really be able to conform to the exact shape for every fold and curve of the shirt.
I am going to be using the full color pink shirt photo here to show you at the end of this section how to remove the color from just the shirt, and not the whole image.
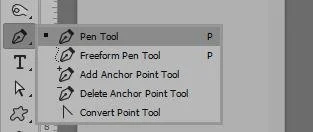
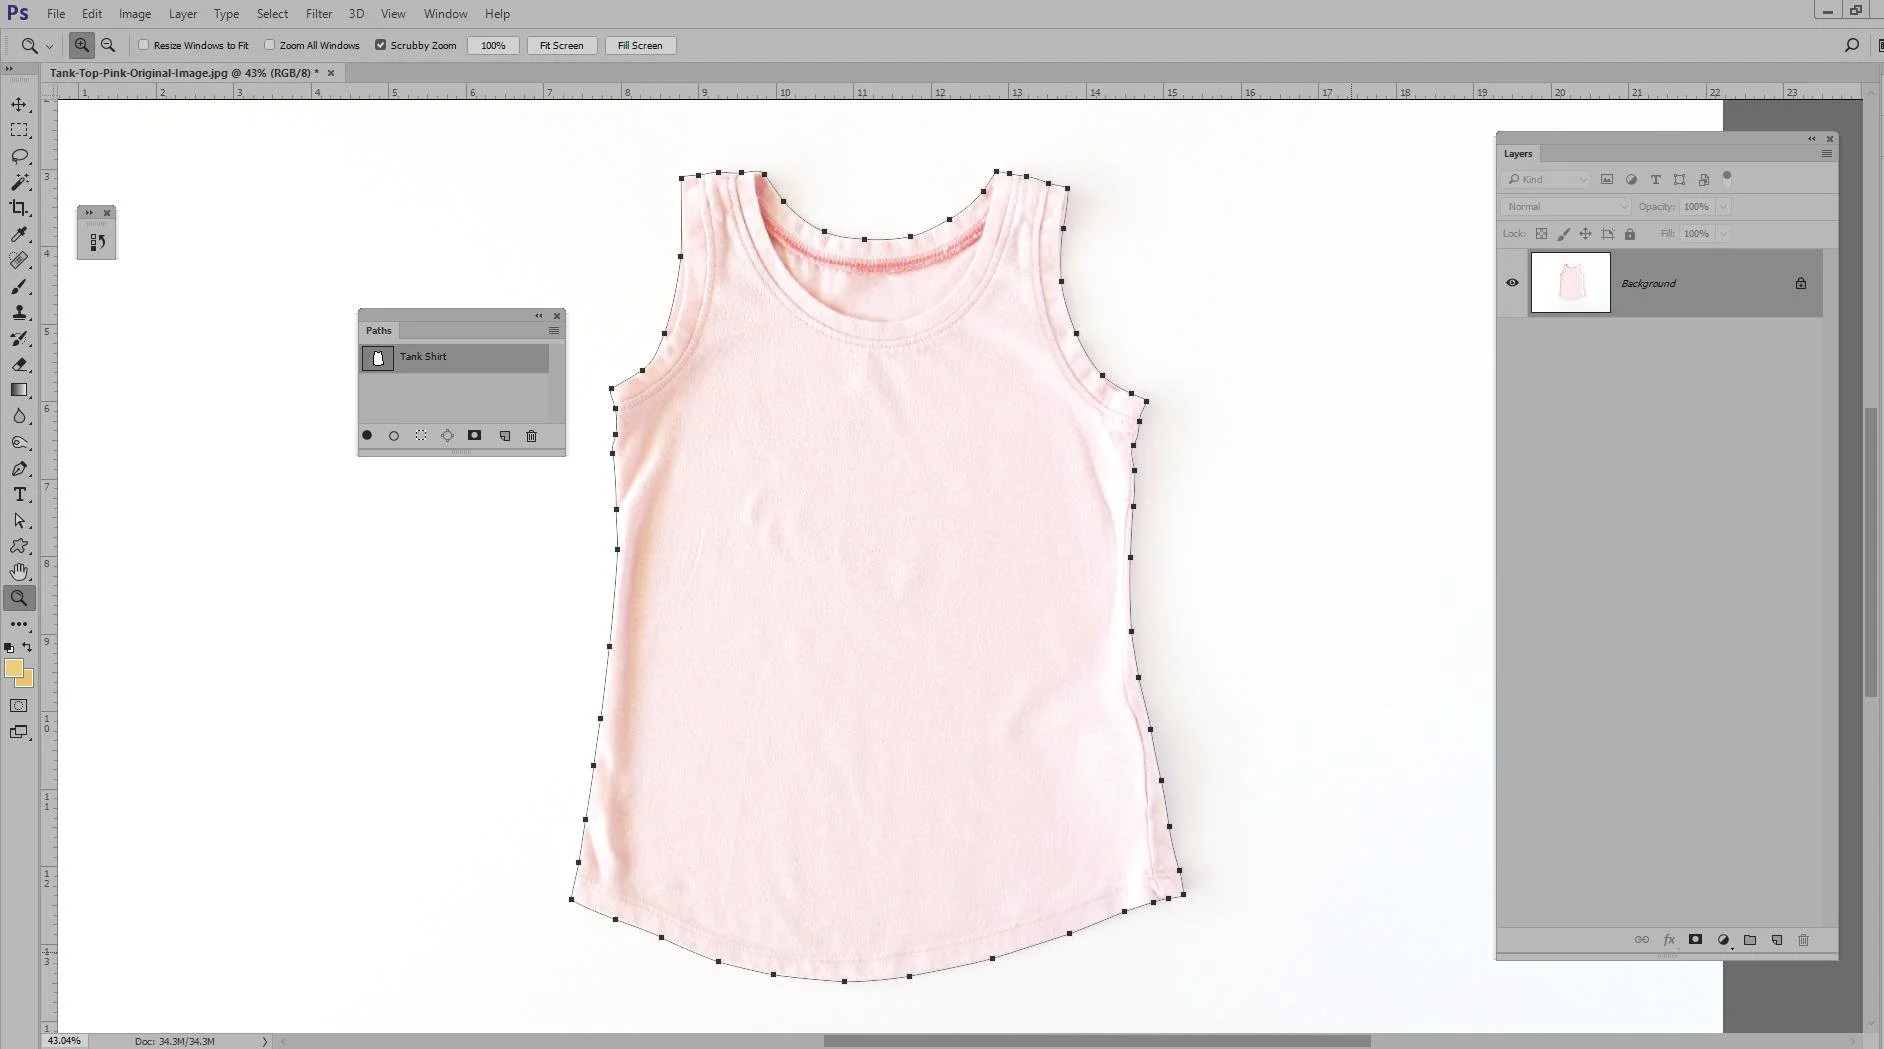
Select the Pen Tool, and Zoom in really close to your shirt. Begin at the top left corner. Then, start clicking and dragging with the Pen Tool right along the outermost edges of the shirt.
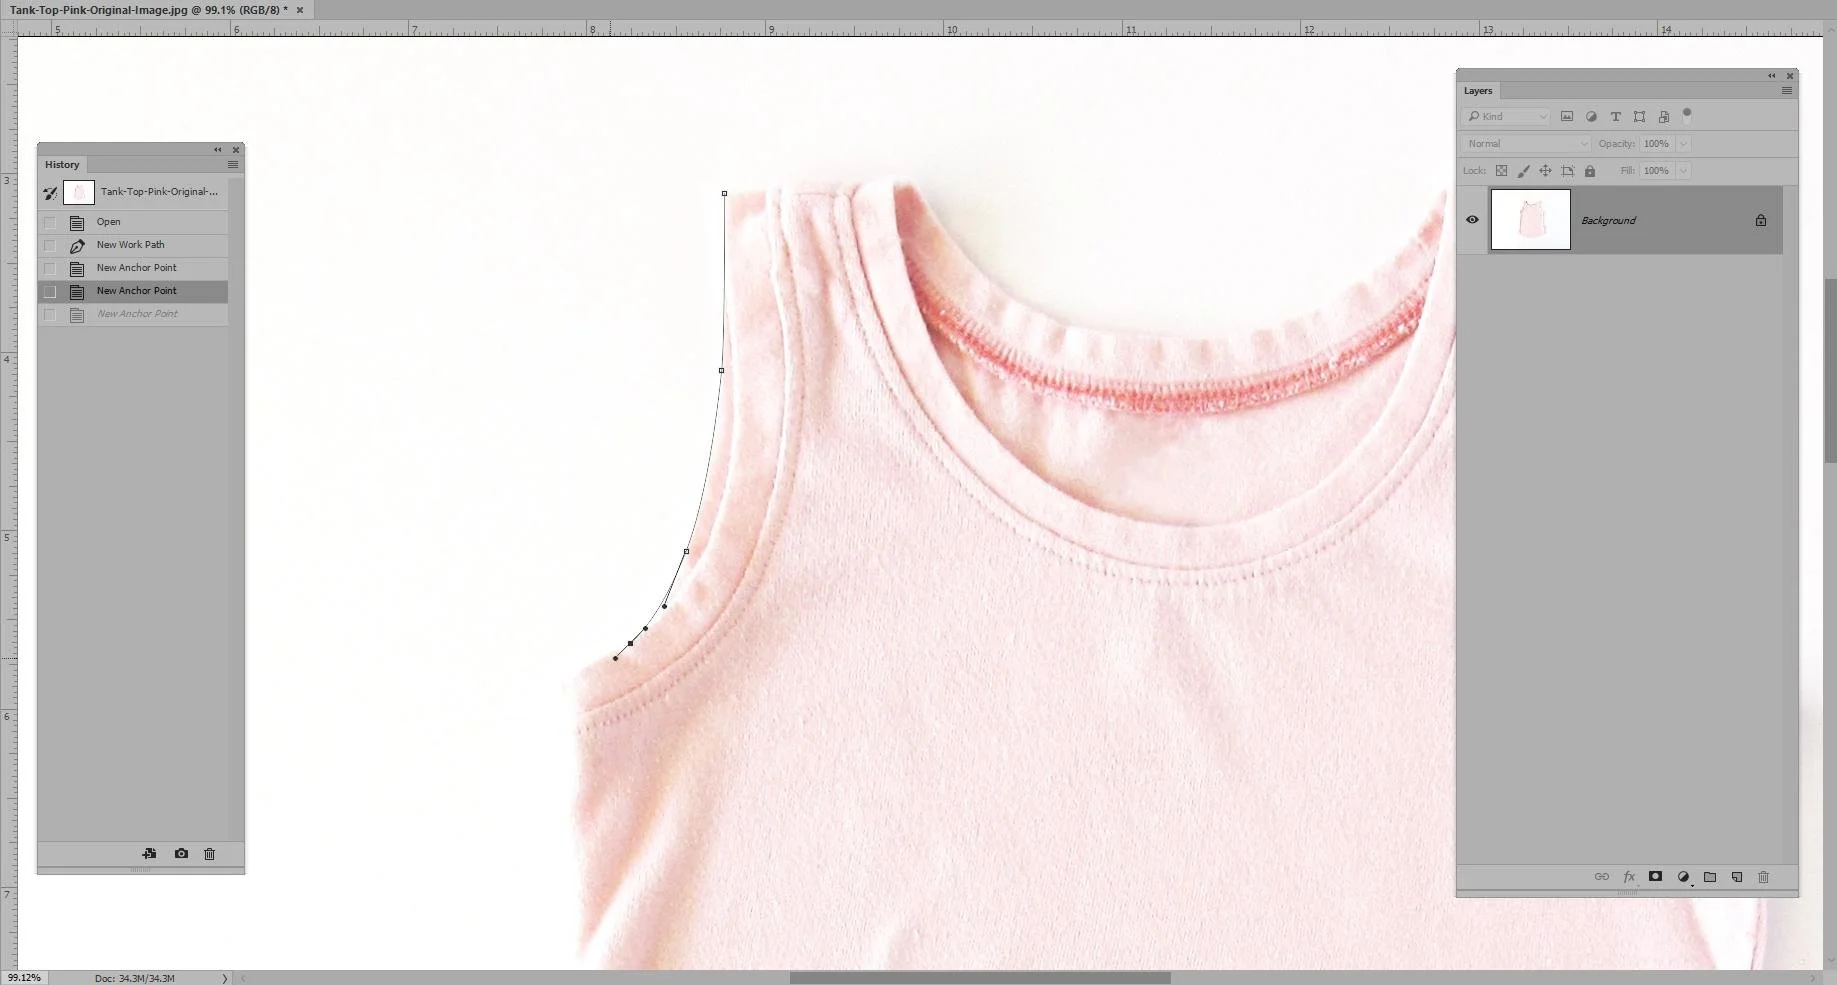
Now, just follow along the entire shirt, until you get back to your starting point and close the path.
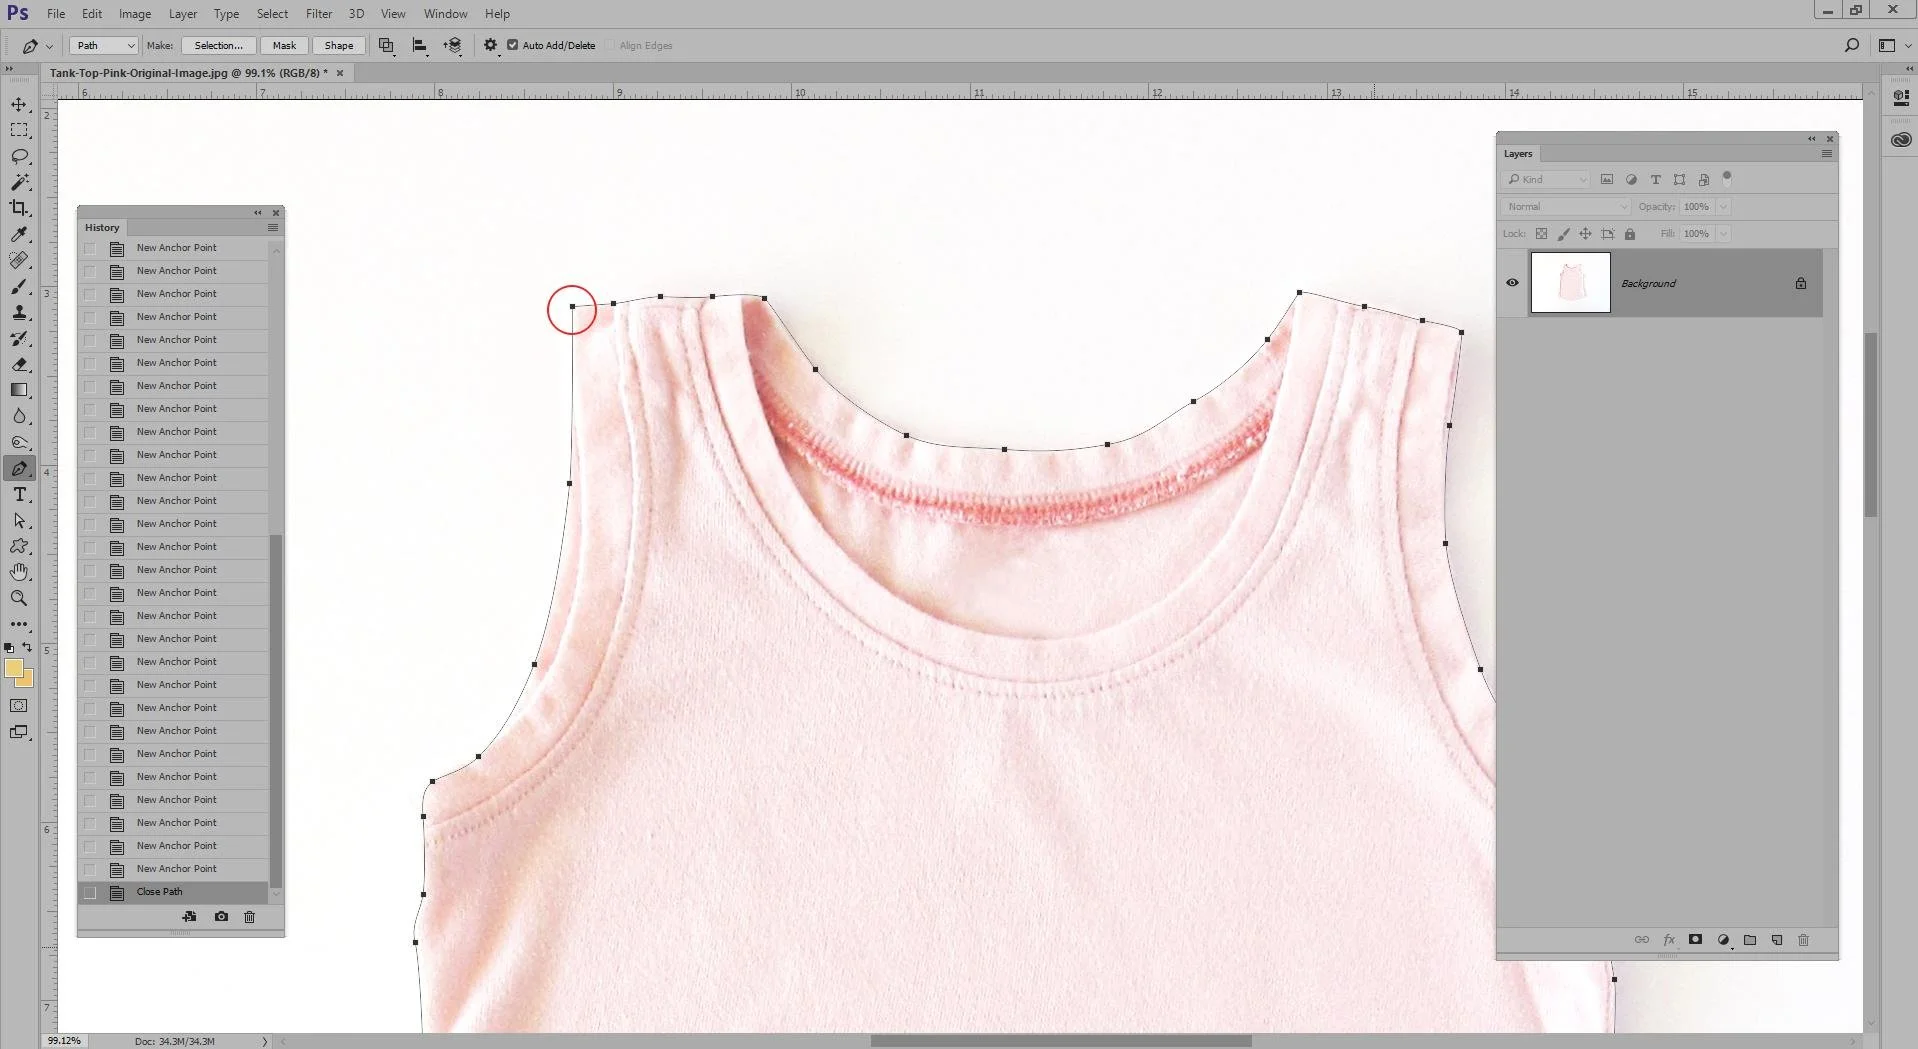
Important step! Go back around the shirt and fine tune your path by adjusting and moving anchor points with the Direct Selection Tool.
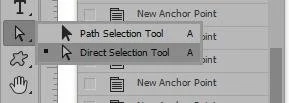
Make sure each point lines up with the edges of the shirt, and that the handles are creating nice curves. I usually zoom in really close for this (300% or so) to get the points lined up just right.
Name the Path
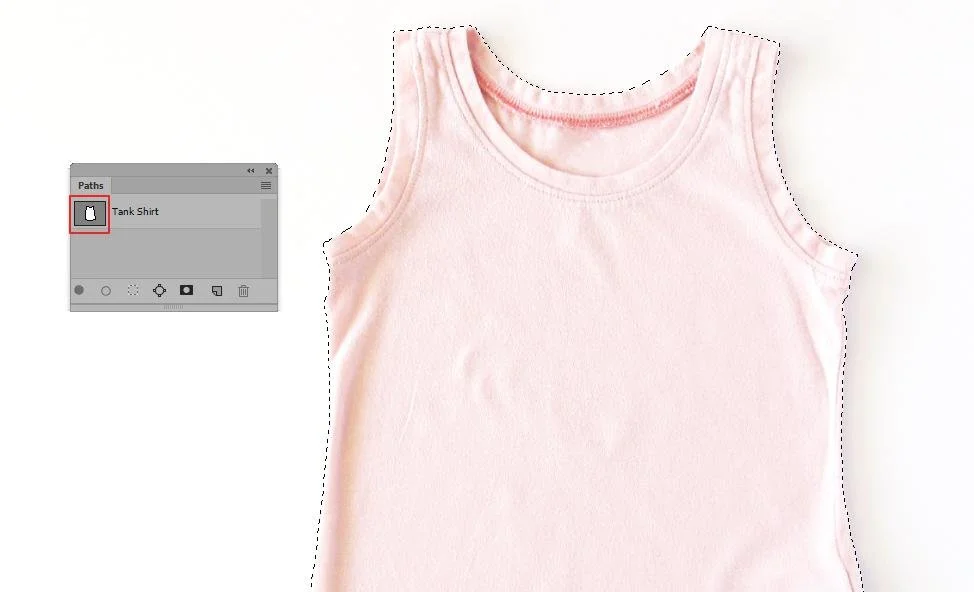
Define the path by selecting it in the Paths Panel. To access the Paths Panel, go to Window > Paths.
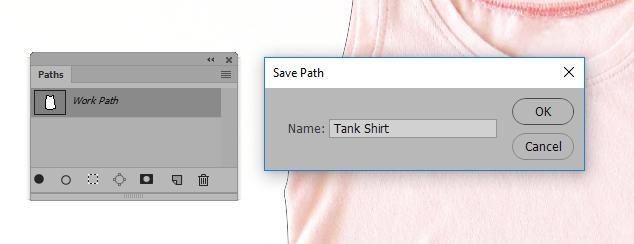
Now the Tank Shirt Path is defined, and you will see it named Tank Shirt in the Paths Panel.
Desaturate only the Shirt and Check our Work
First, let’s create a New Layer in your Layers Panel and name it Tank Shirt (this will become our Smart Object Layer in the next step).
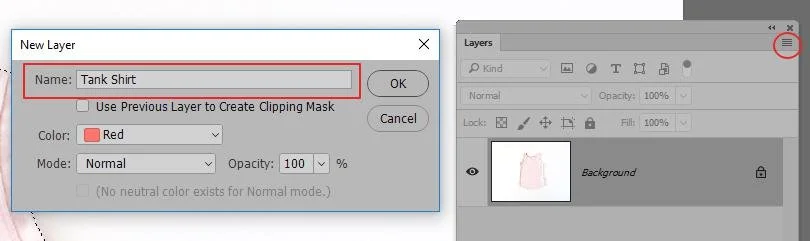
After naming it Tank Shirt, I changed the color of the Layer to Red, and left everything else the same for now.
Note: At this point, I saved out my file and named it Kid-Tank-Top-Mockup.psd
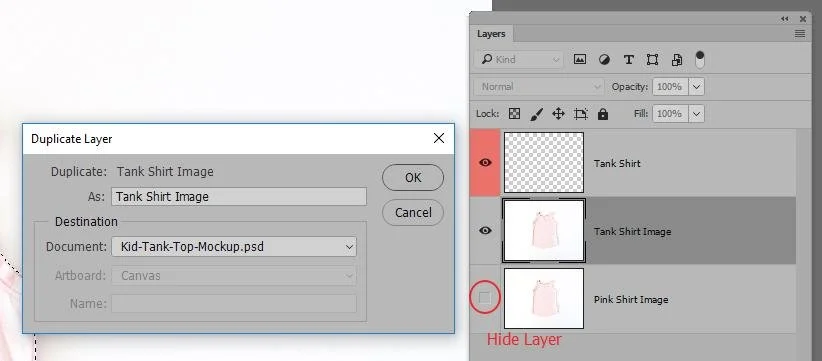
We are going to remove the pink from the shirt, if you did not do that in Step 1, and check how our path looks by filling it with a color. Still in your Layers Panel, Rename your Background Layer to Pink Shirt Image, then Right Click (or drag to new layer) and Select Create Duplicate Layer, and name this one Tank Shirt Image. Hide the Pink Shirt Image.
Next, select our new path in the Paths Panel, hold down the Ctrl Key (or Command Key for Mac), and then Select the Path Thumbnail. You will now have a marching selection.
Now, go to Window > Adjustments and Select Hue Saturation.
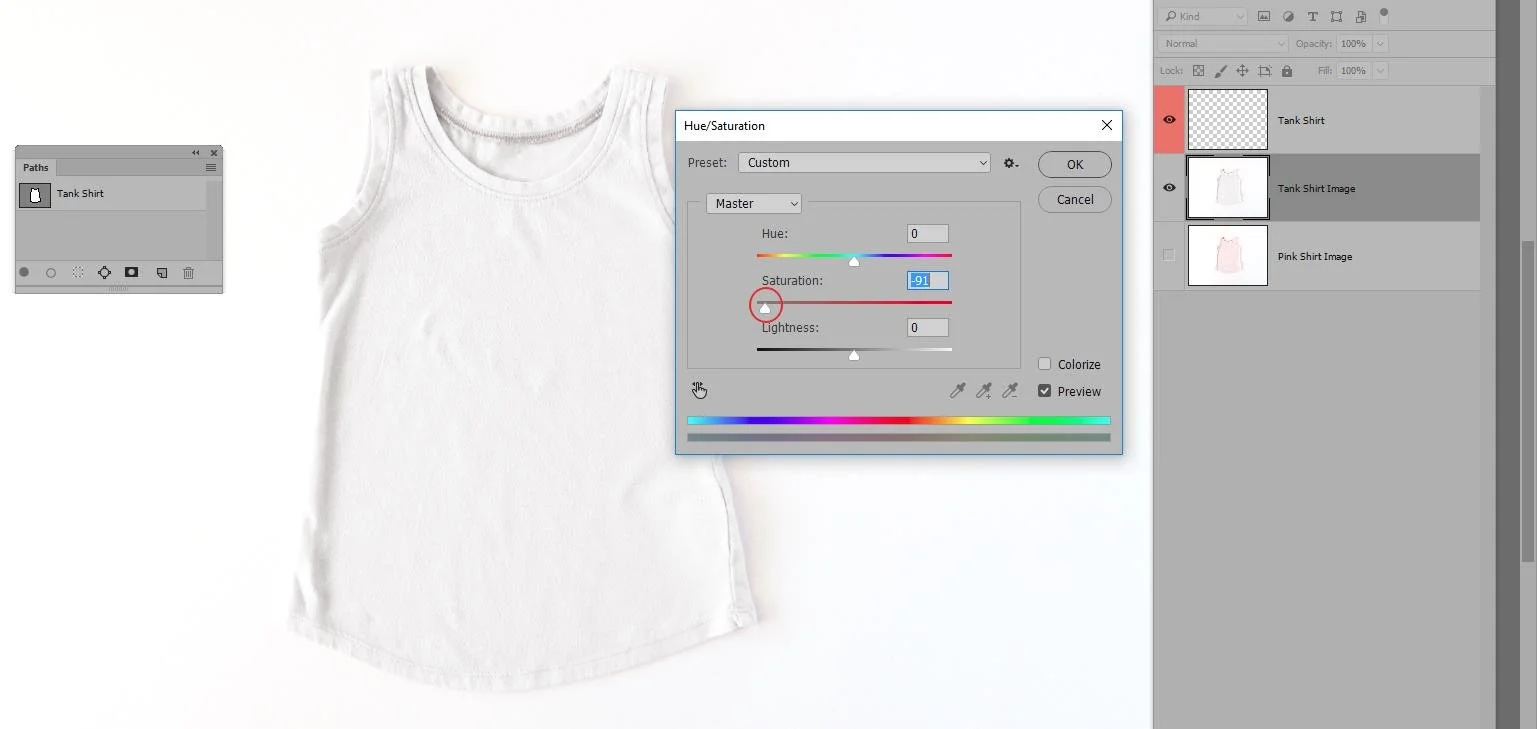
Adjust the Saturation slider to the left and desaturate only the shirt. You will notice that there is some pink color contamination in the background white area around the shirt. This is why it is best to use a white object, or desaturate the whole image. But, it is not too noticeable, and when you eventually separate the shirt from the background it will not be there (I will talk about this in another post).
Fill the Tank Shirt Layer with Color
Select your Tank Shirt Layer and pick any Teal color as your Foreground Color (I used #9cd1d3). With your Tank Shirt Path still Selected, Fill it with the color.
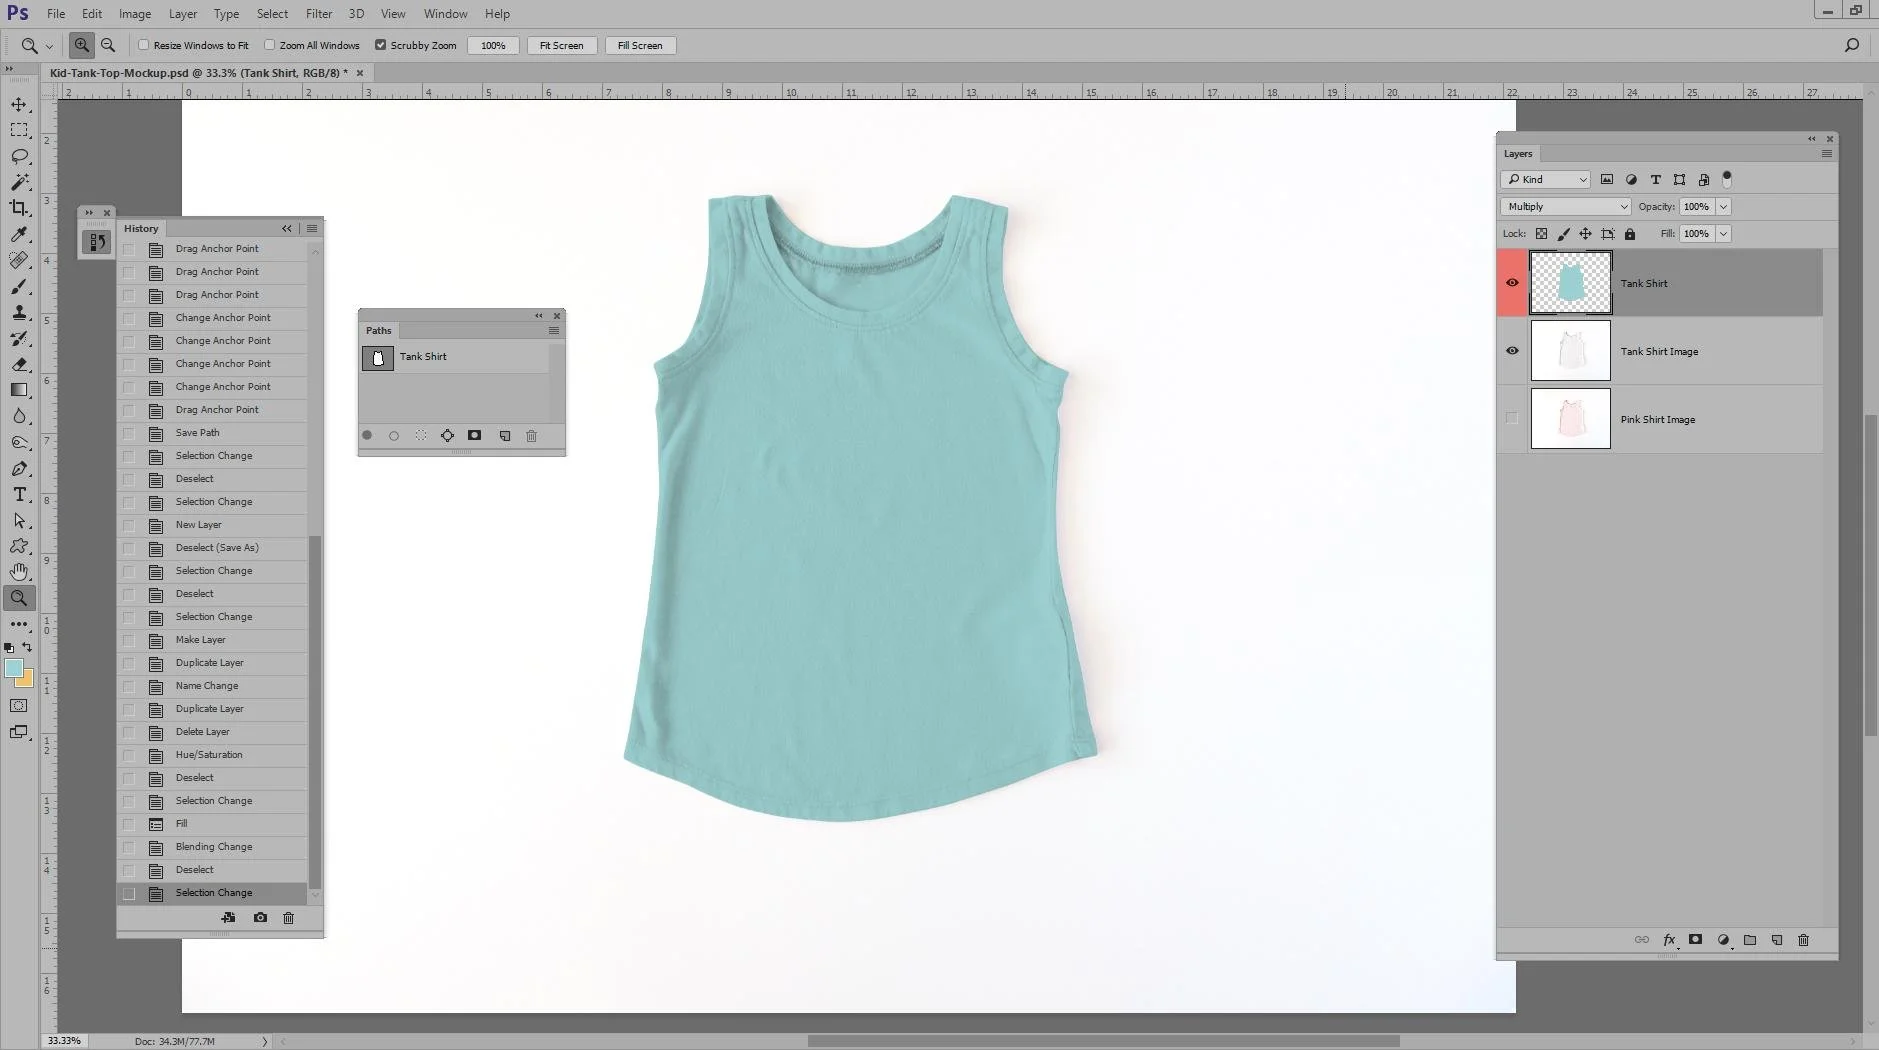
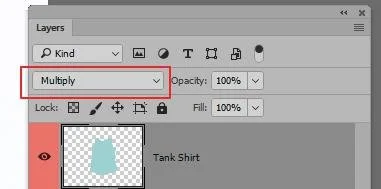
In the Layers Panel, change the Blending Mode to Multiply.
Everything should line up and look clean.
Create your Smart Object Layer
Your Tank Shirt Path should still selected in the Paths Panel. If it is not still selected, you should select it again.
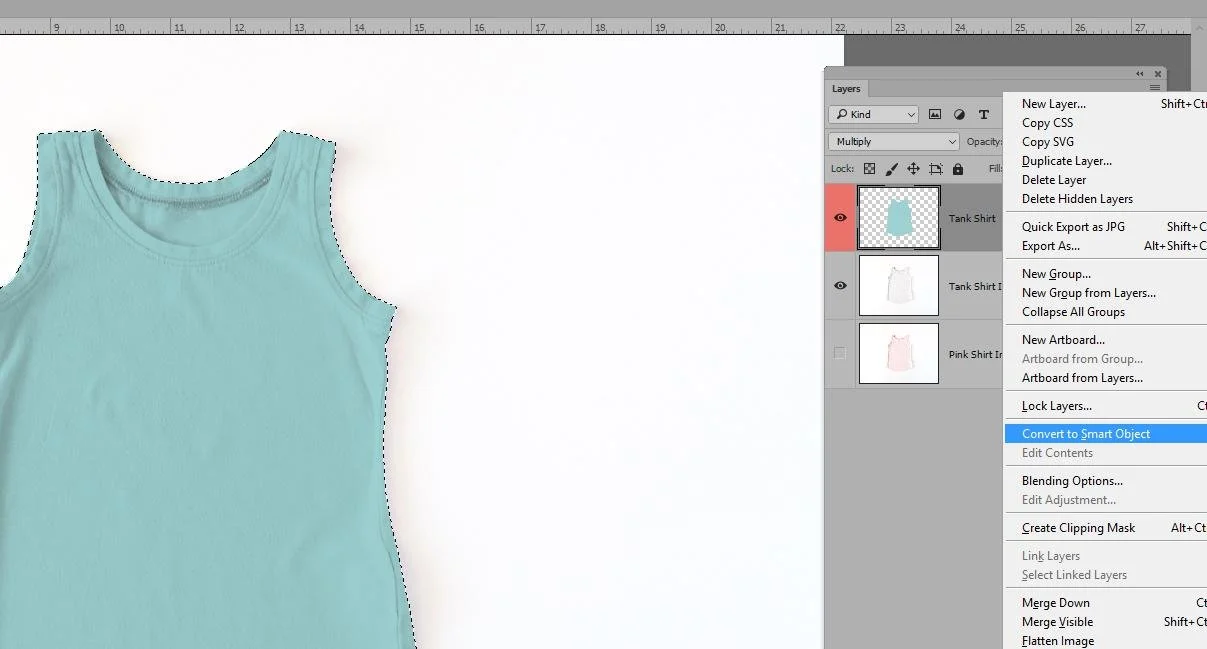
Within the Layers Panel, Select Convert to Smart Object. You have just created and defined the Smart Object Layer.
You should see the Smart Object Thumbnail.
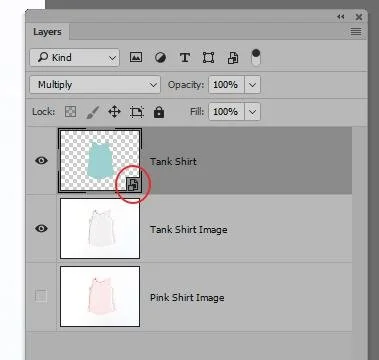
Save your file before moving to the next step.
STEP FOUR - APPLY THE DESIGN, HIDE EDGES & SAVE
Our mockup is almost finished!
It is time to put our pattern design (or other artwork) inside the Smart Object Layer. I included an image of a pattern in your download, so you can use it for this tutorial or use your own artwork. Note: The provided pattern image may only be used for doing the tutorial, and should not be used in any other way.
Select and double-click the Smart Object Layer thumbnail to open your new .psb file (shown below).
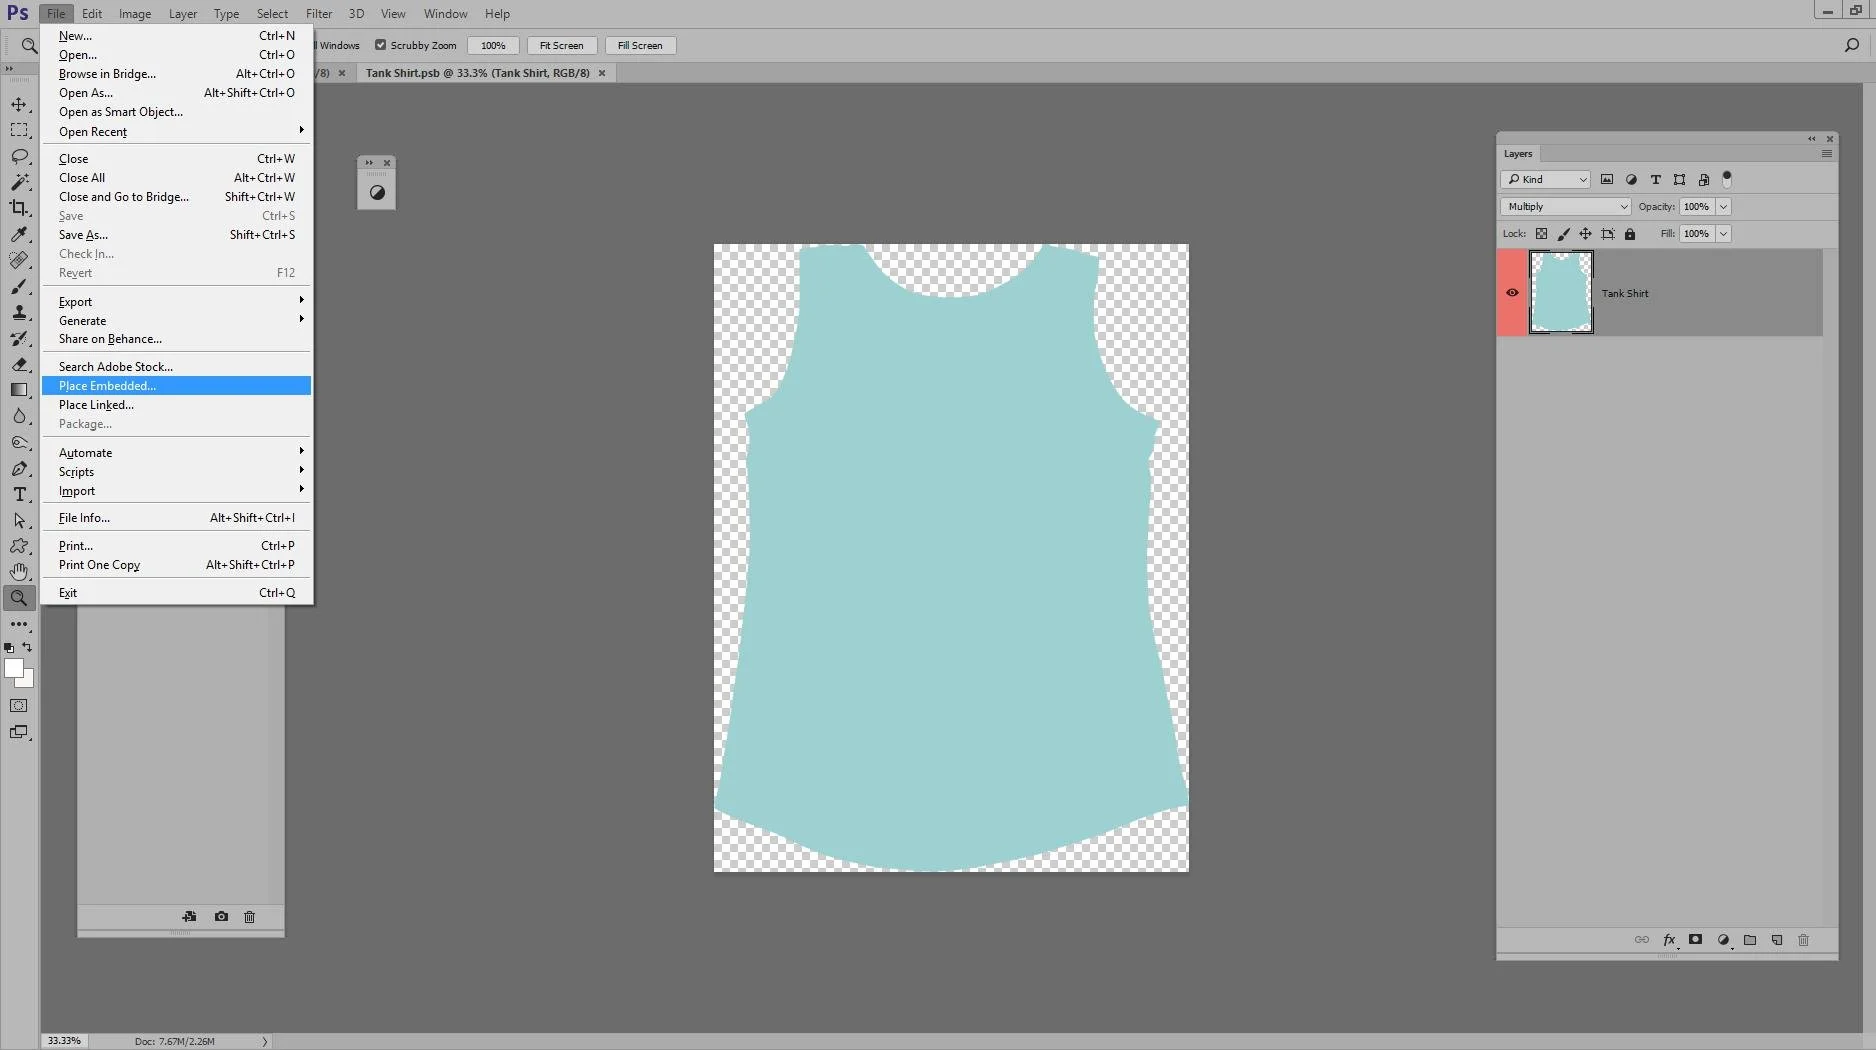
Now go to File > Place Embedded to add your image (or you can copy and paste to place a linked image, or select Place Linked, but if you don’t want to deal with linked files, go the embed route).
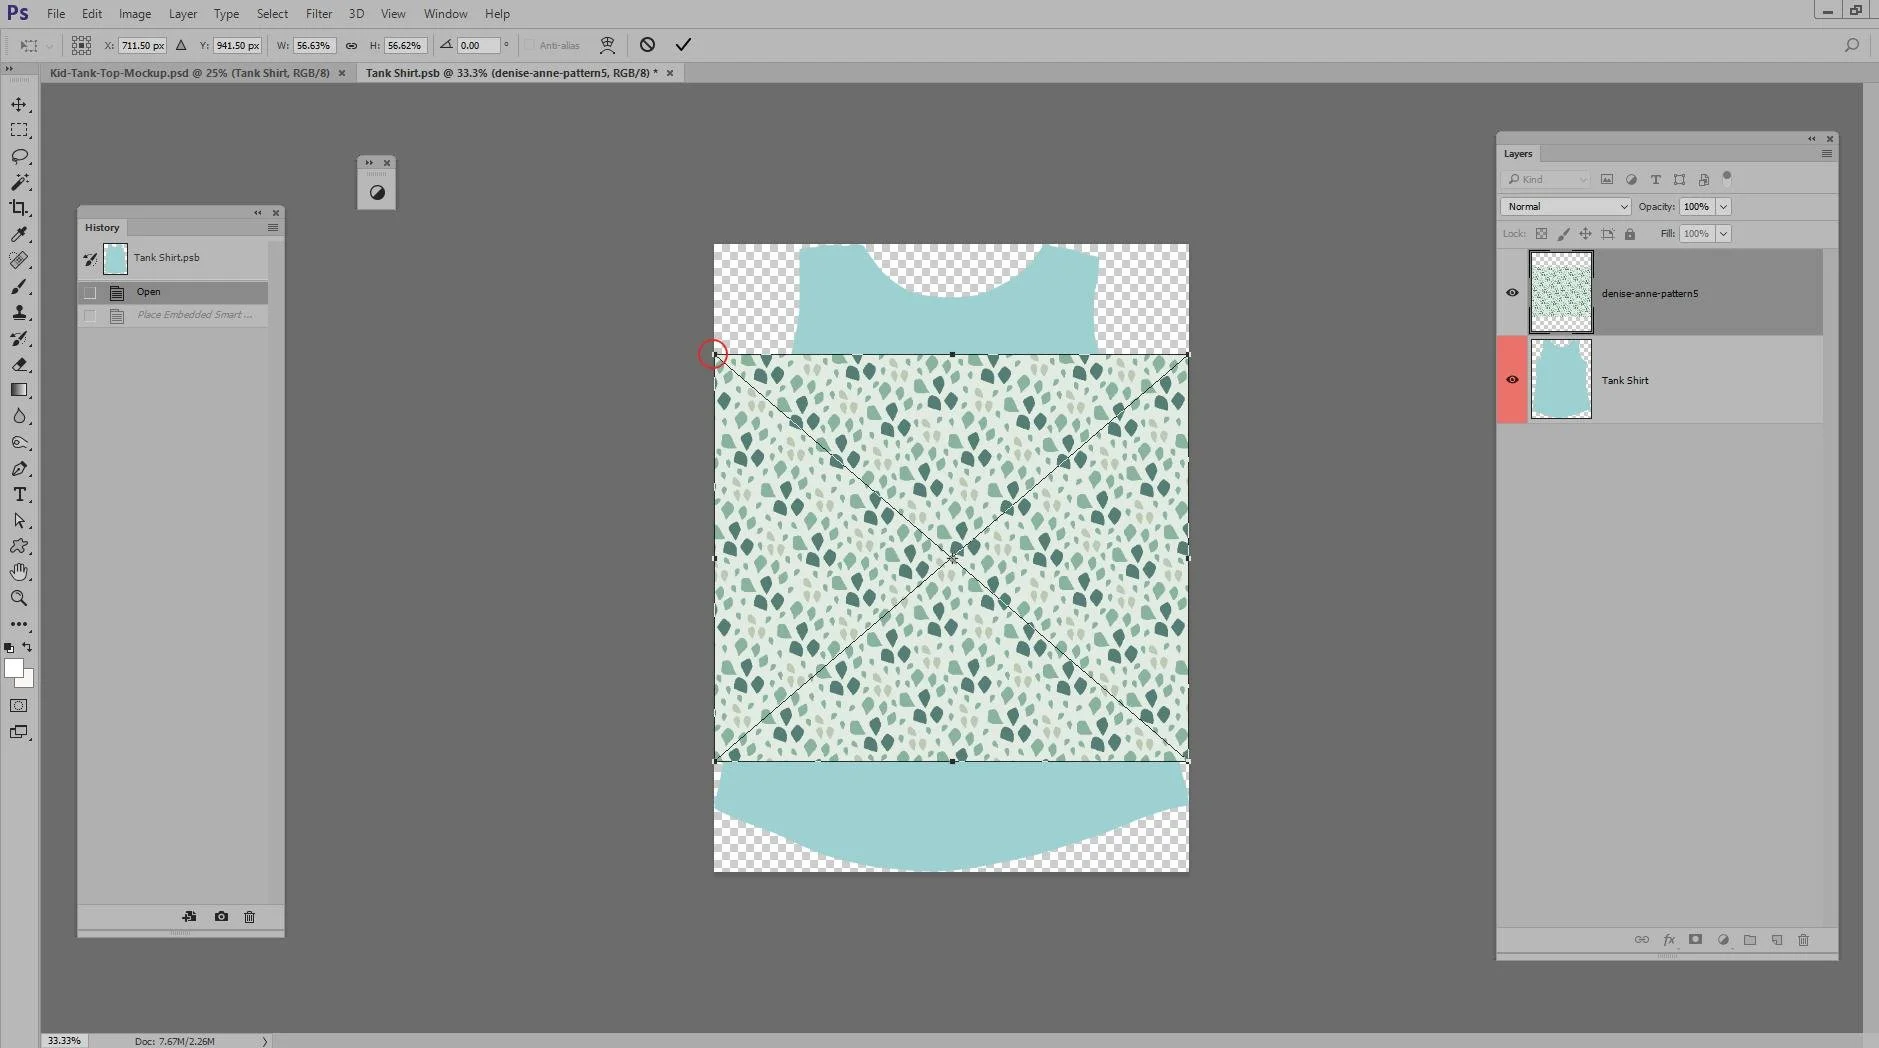
Select your artwork, and holding down the Shift Key scale the artwork to fit over the shape of the placeholder shirt. (It is ok to scale since the artwork is larger than needed) Then, turn off our placeholder color layer, because it is not needed, by clicking on the Eye icon. Now, Save and Close the .psb file.
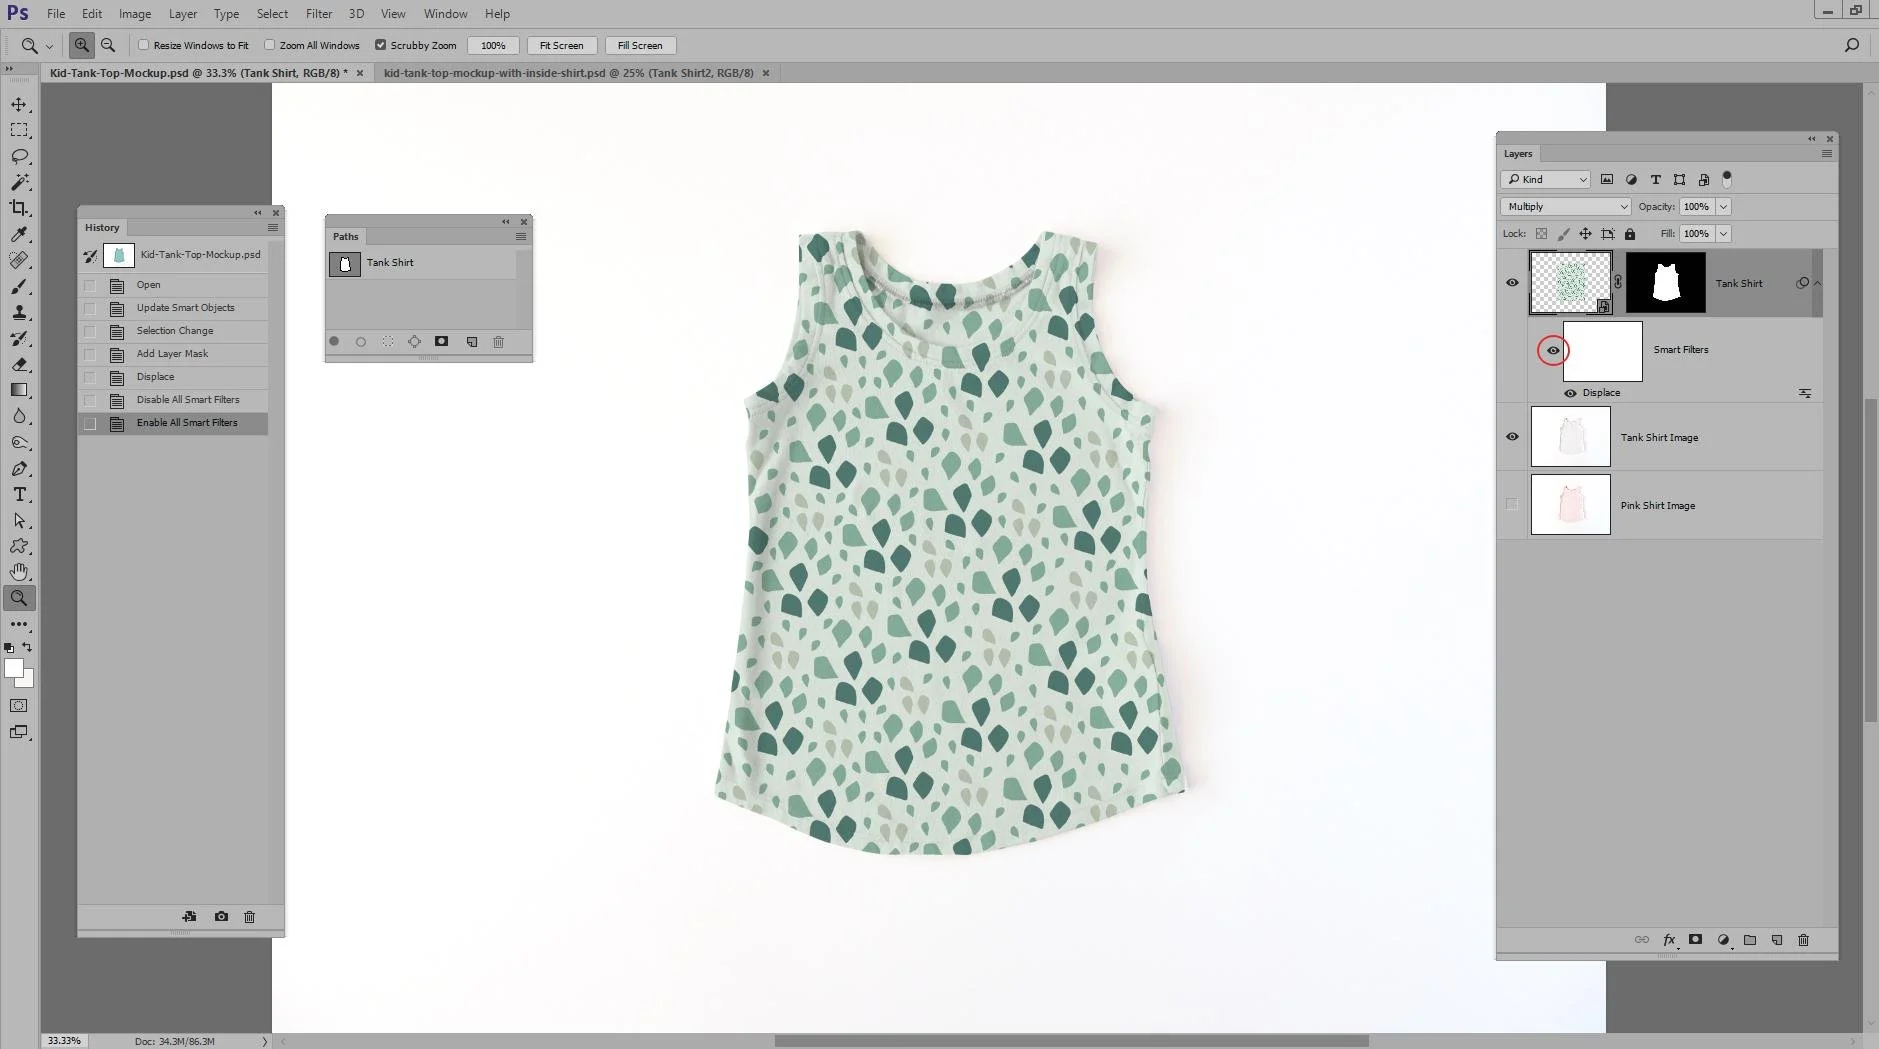
Your Mockup should look like this once you save. Next, make sure your layer is set to Multiply. You should see the shirt through the pattern.
We still have our pattern design overlapping the edges of our shirt and not conforming to the shape. So, let's fix it -- Spoiler alert-- This is my favorite part (gotta love masks)!
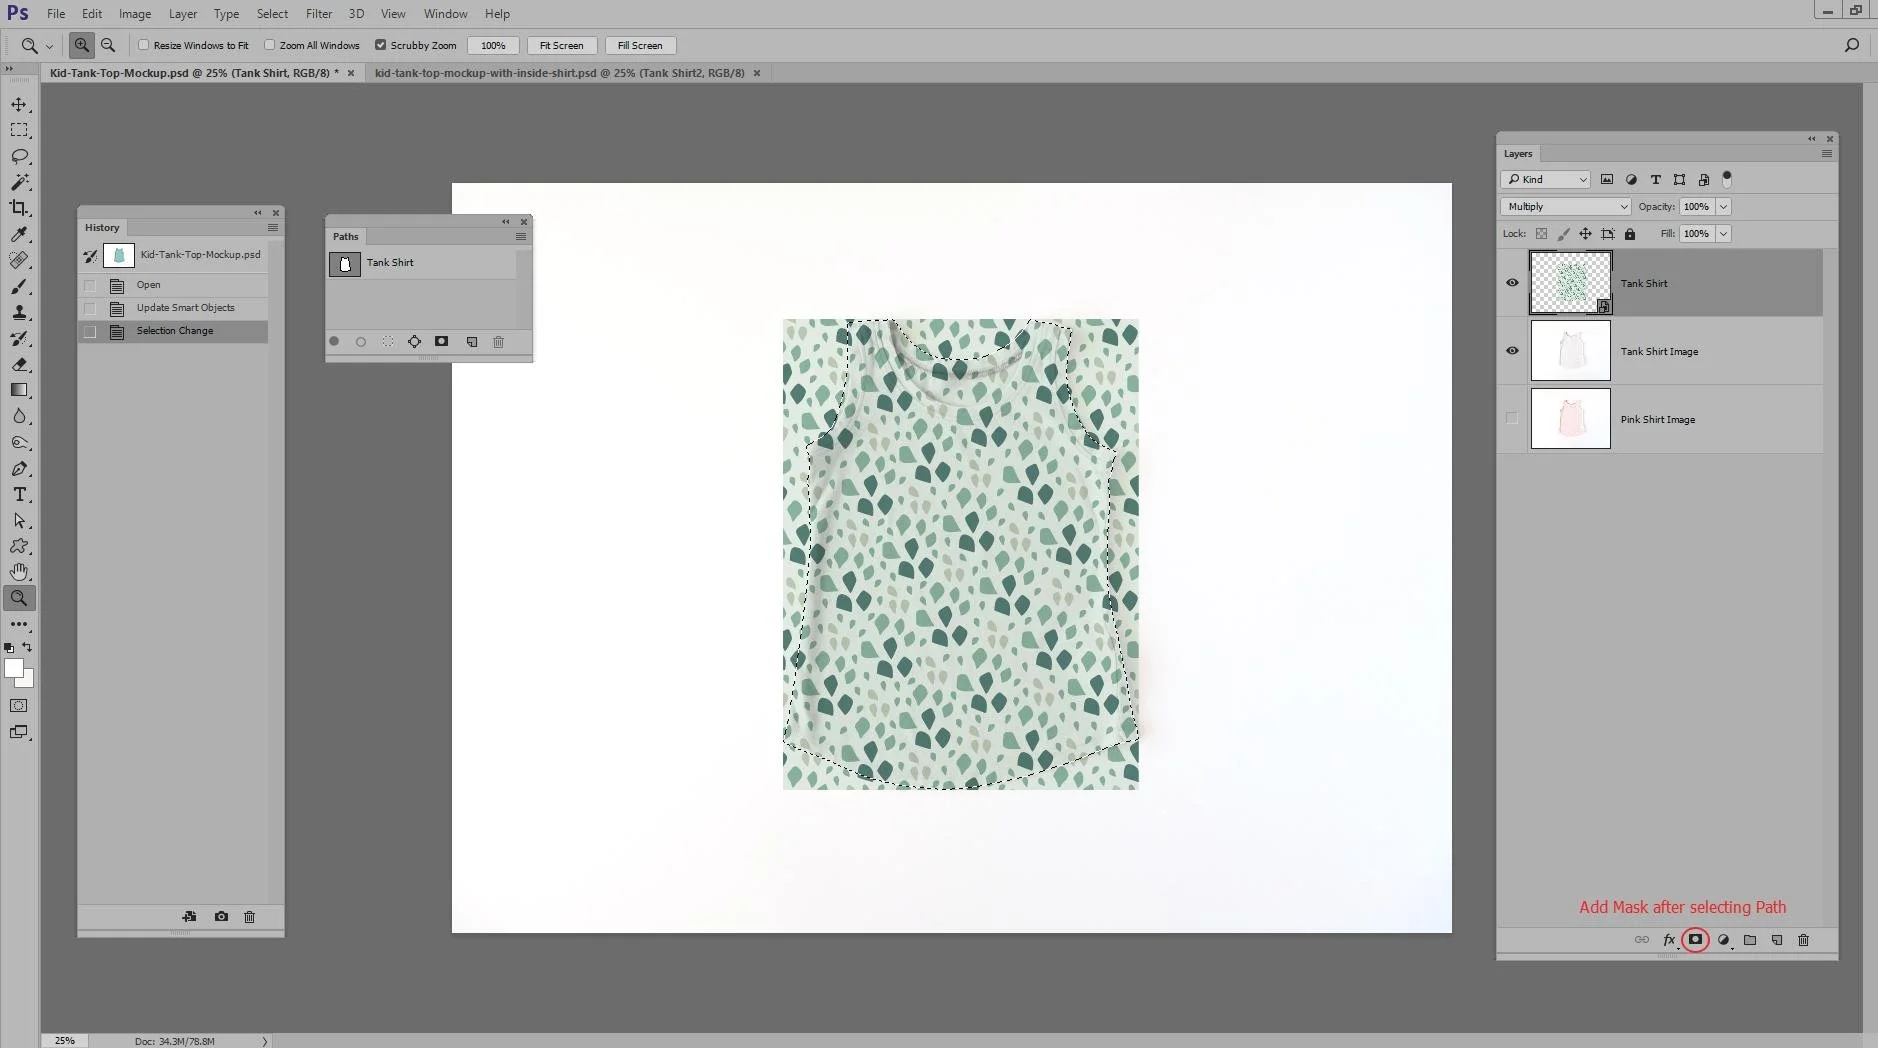
Go back to our Paths Panel and Select the Path by using Ctrl Key and Selection Tool (or Command Key for Mac). Everything should be selected just like we did before.
Now, go to your Layers Panel and Select Mask.
And, voila, there it is!
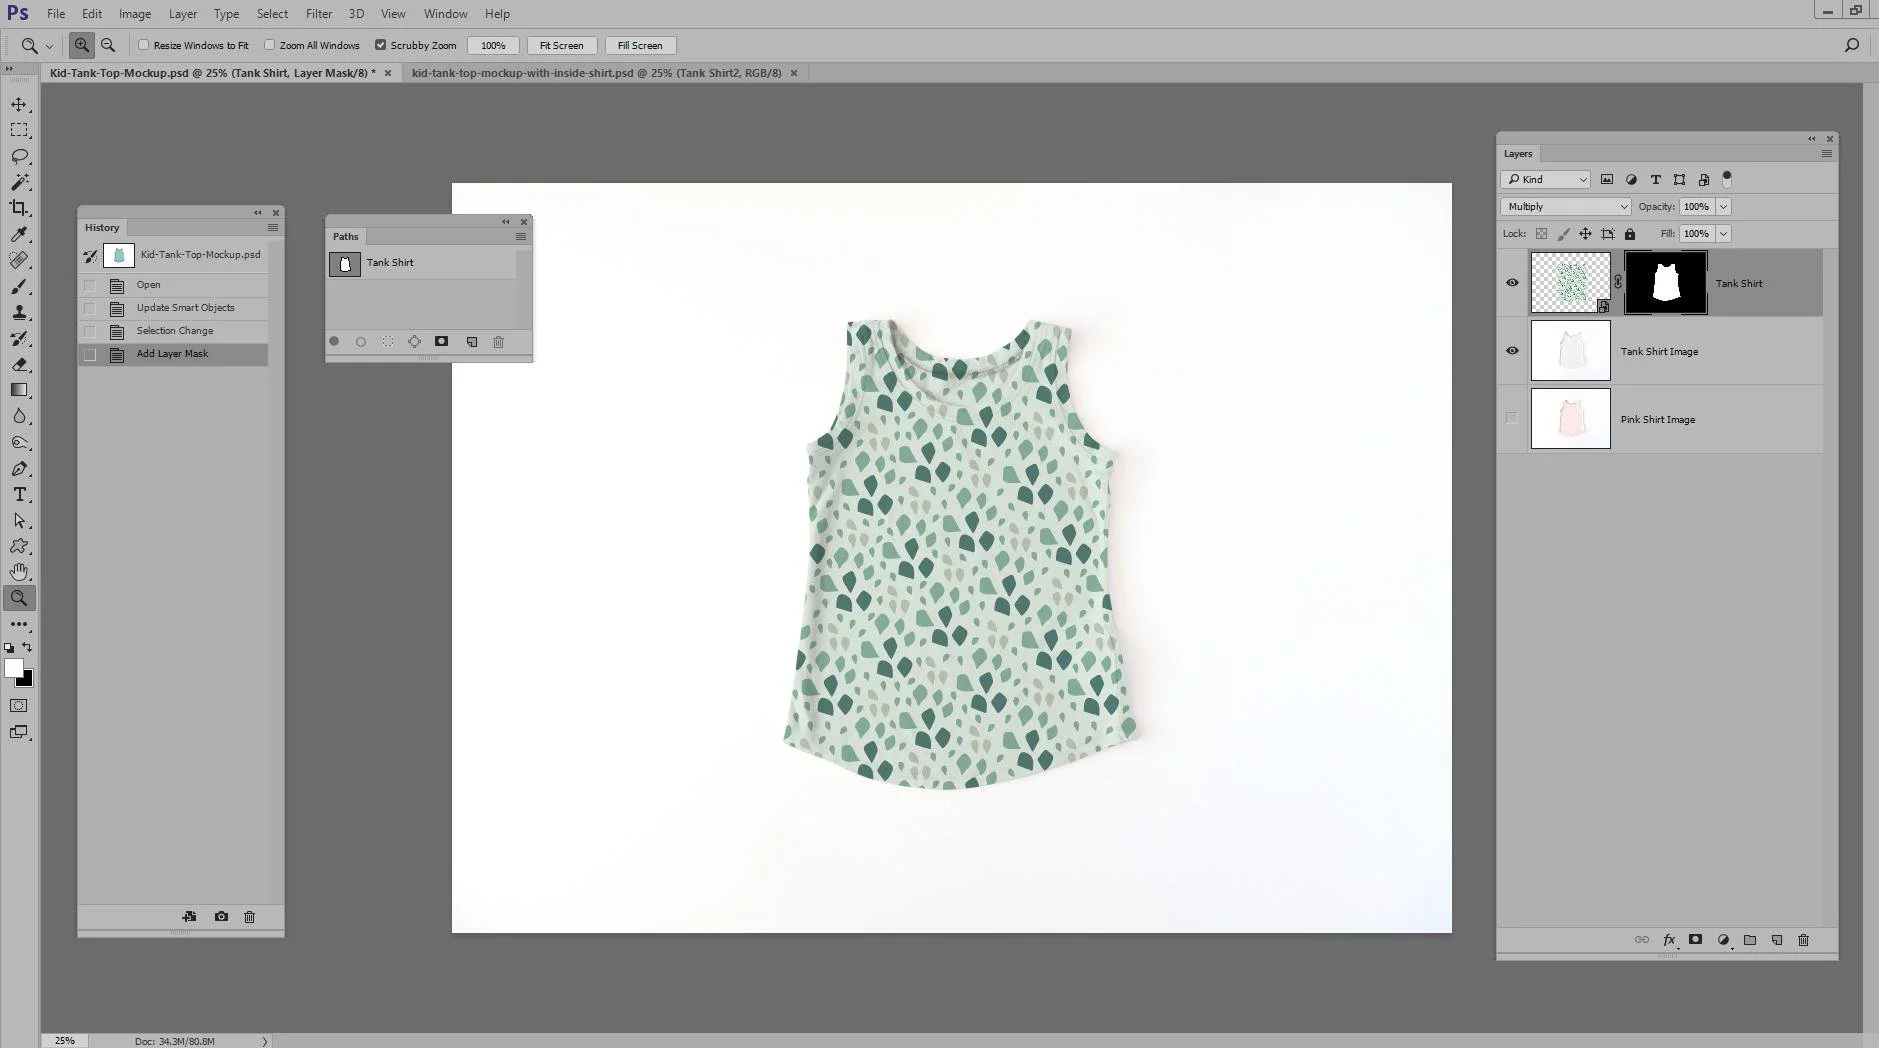
Your artwork is now perfectly conformed to the shape of the shirt, and all edges should be hidden.
Add the Displacement Map
To give a more realistic look to the artwork on fabric, we are going to use the Displacement Map we created earlier. I currently only use and create the maps for fabric mockups.
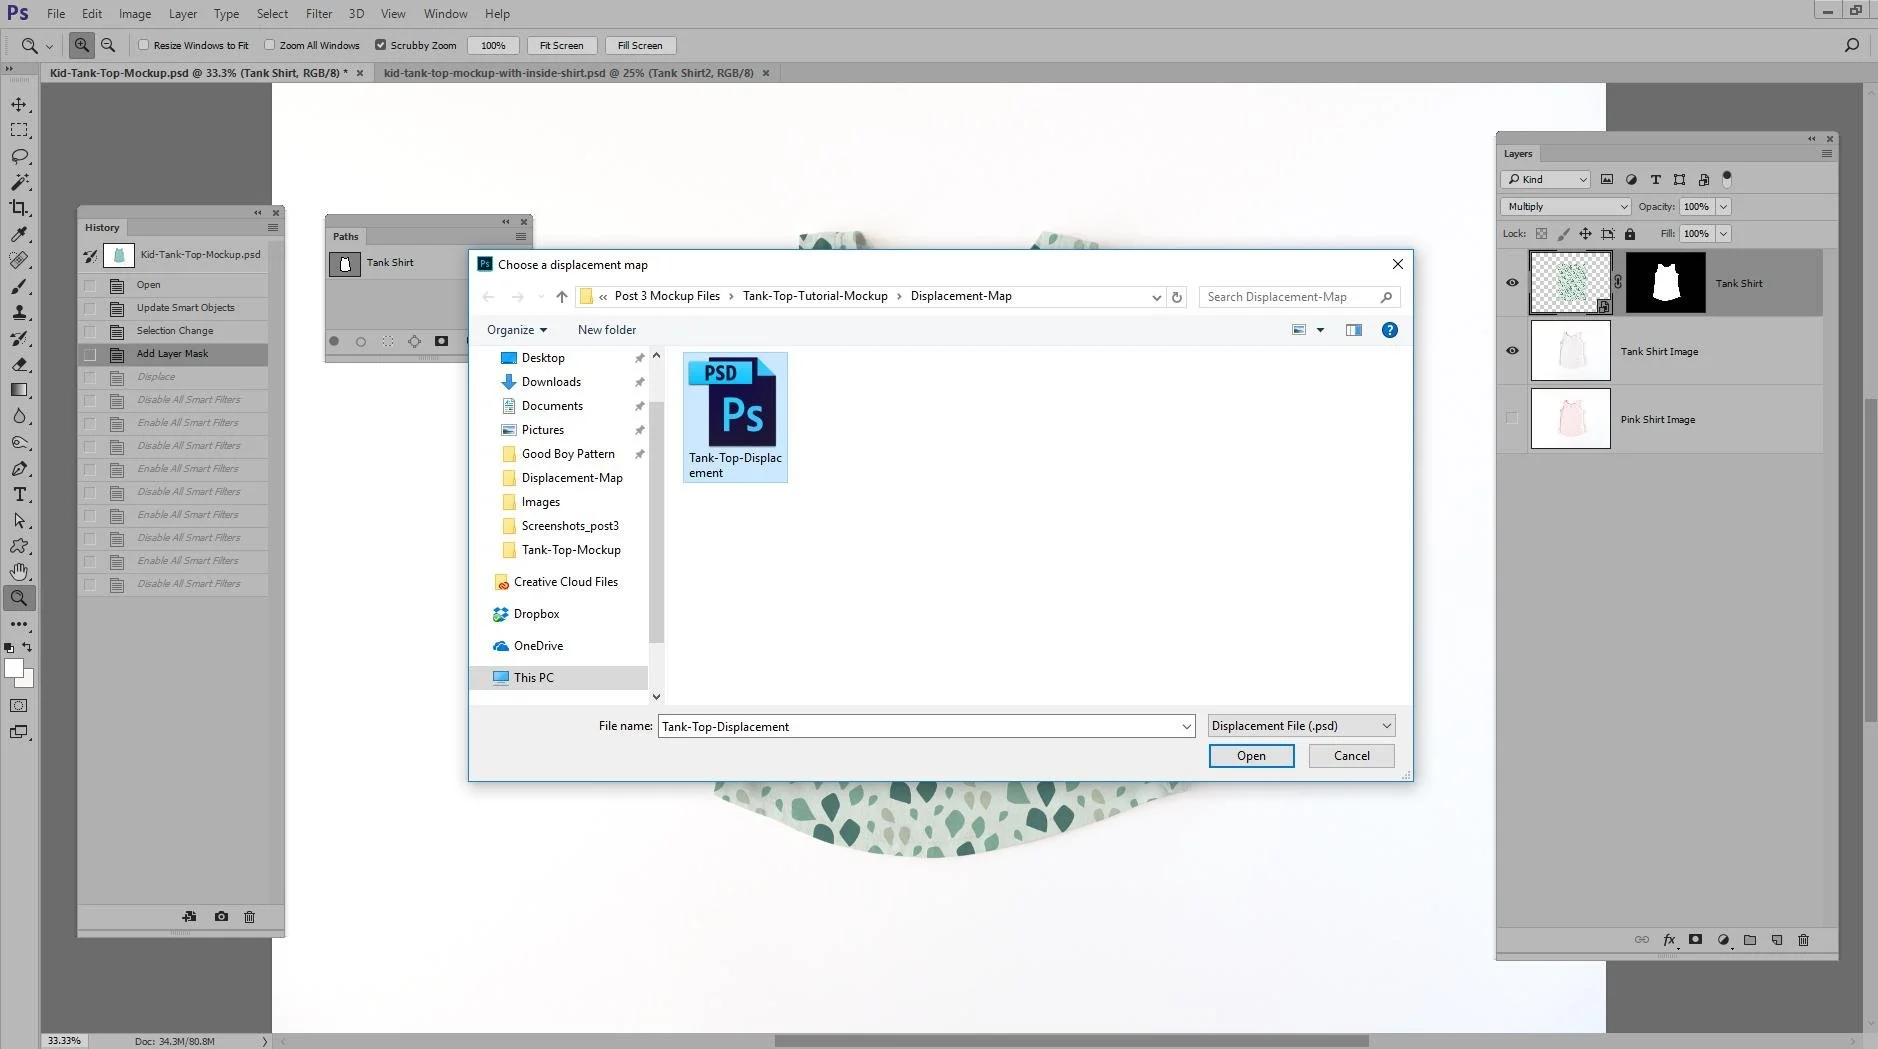
With your Layer selected, go to Filter > Distort > Displace, keep everything the same in the dialog box, and select the Photoshop Displacement Map file. Note: This is the file you created in Step 2, or you can use the one I included in the download.
You will notice a small change in your image, but it creates a realistic effect as it conforms to the shirt. Toggle the Displacement Map on and off in your Layers Panel to see the change.
One of the things you will notice is that the right corner (and sometimes bottom) of your mockup will shift over and to the left when using a Displacement Map or, sometimes, it can expose part of your shirt. Here is a close up of what I mean.
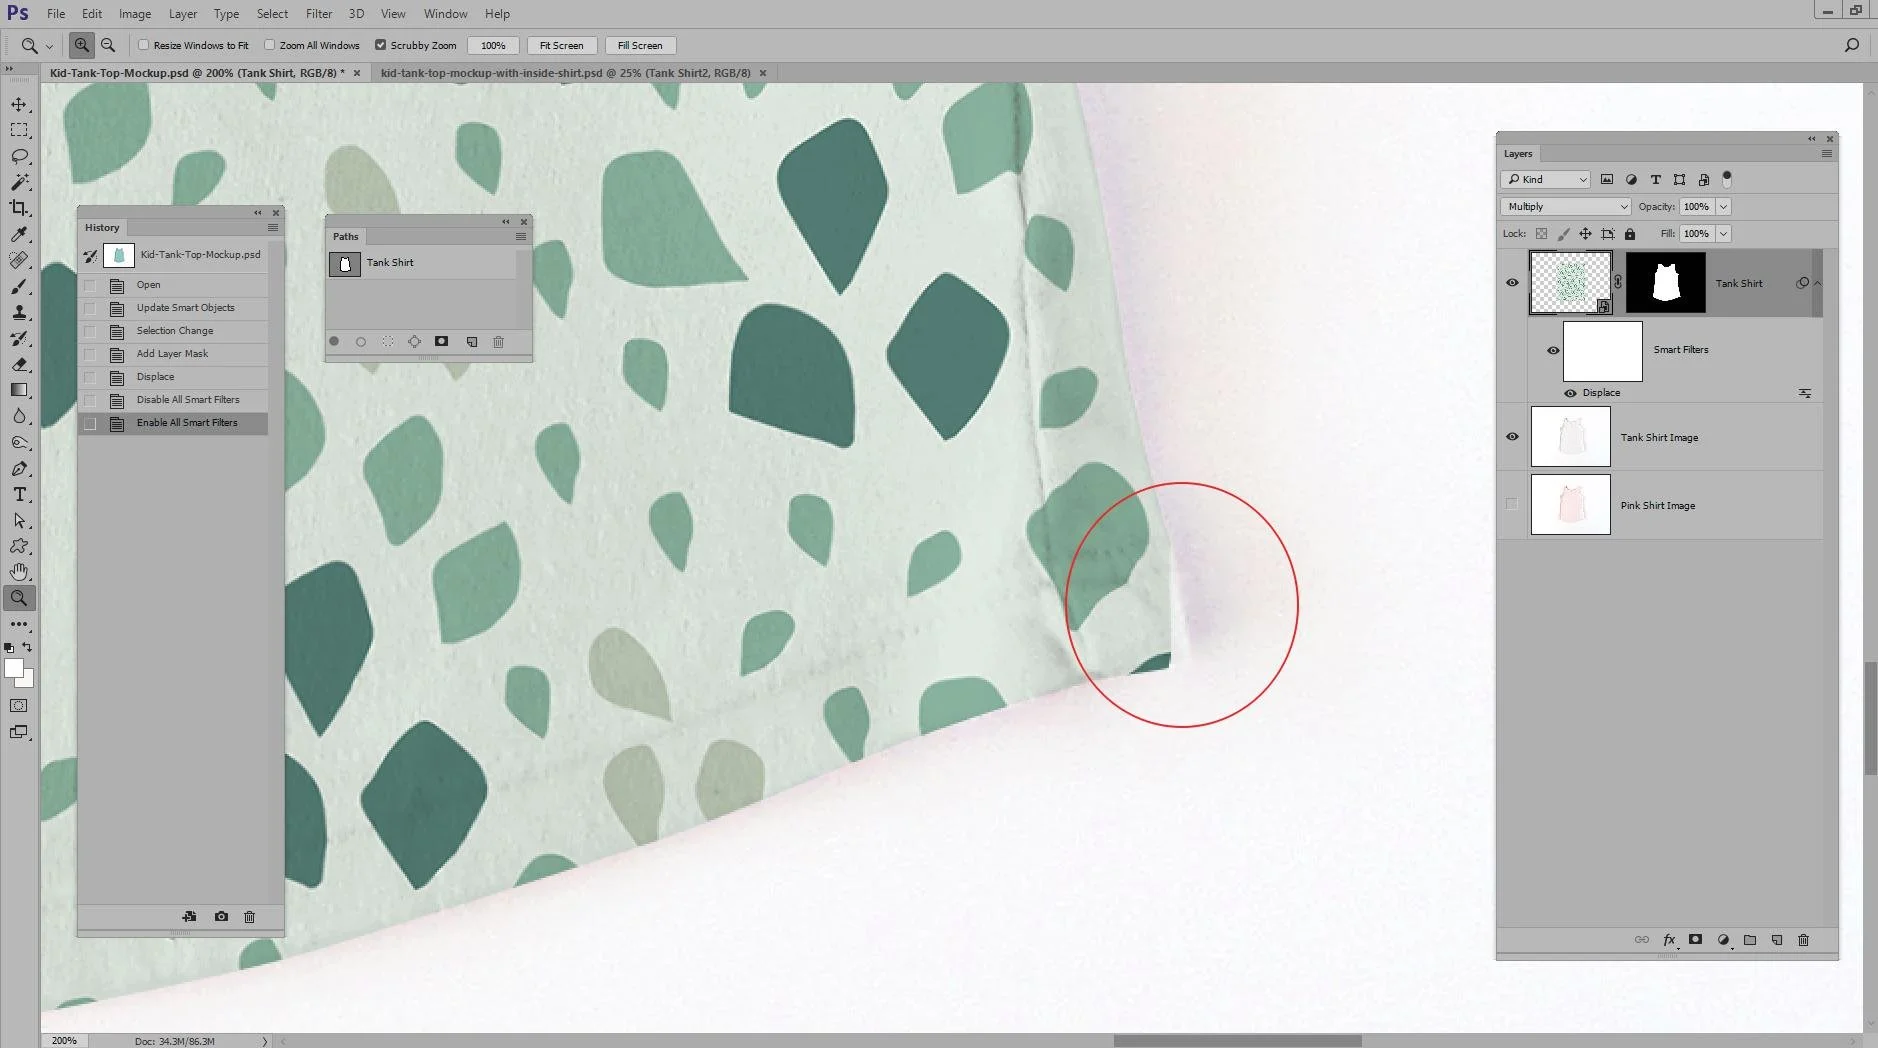
If it is bothersome and too noticeable, there is a super easy fix to this problem. Go into your .psb file (using the thumbnail), and we are going to enlarge the canvas (this is why I make my images larger than my mockup area to account for displacement shifts).
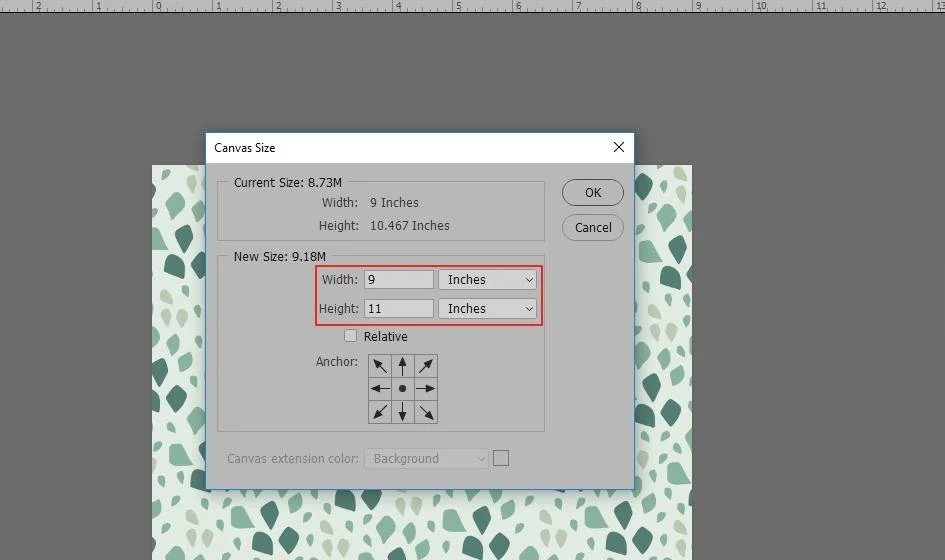
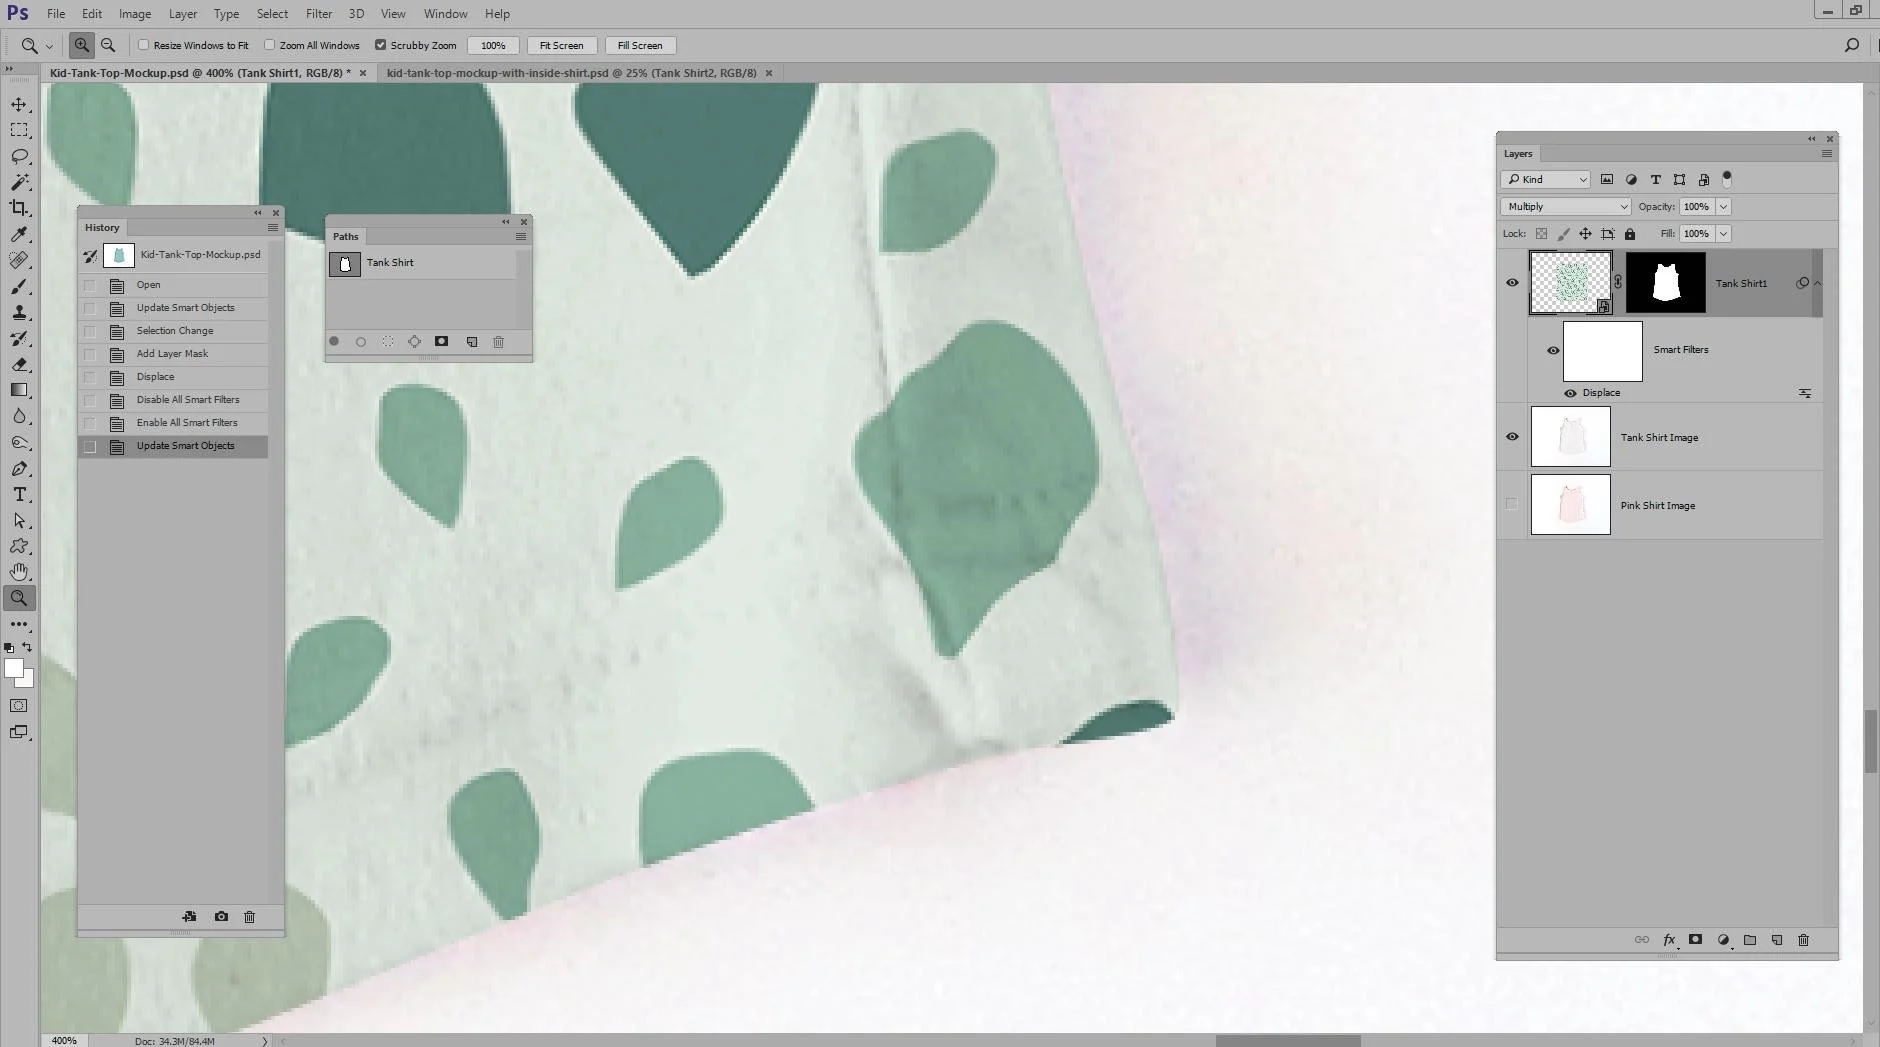
Change the Width of your canvas from 7.906 to 9 inches, and height to 11 inches. This will be enough to cover the displacement shifting.
See other mockups you can buy in this other blog post.